How to get Parallax Effect Using Row Formats Settings in WebSite X5 
Autore: Incomedia
Starting from version 13, you can use Row Formats to set Parallax Effect on your web pages. You will be able to achieve the same result as the MyRoseMary free Project Template if you follow this tutorial.
To get started:
- Download MyRoseMary Project Template from the Marketplace and import the project into WebSite X5: https://market.websitex5.com/en/projects/159687
From the inside you'll learn faster how to set parallax on your own projects.
- Keep the browser opened on the Template Live Preview.
So you'll have the sample site in plain view.
1. Parallax and Row Formats in WebSite X5
The Parallax is a special web design effect where background images move slower than foreground images, creating an illusion of depth. Scrolling down you see a multi-levelled page with images and graphics on different levels moving at different speed.
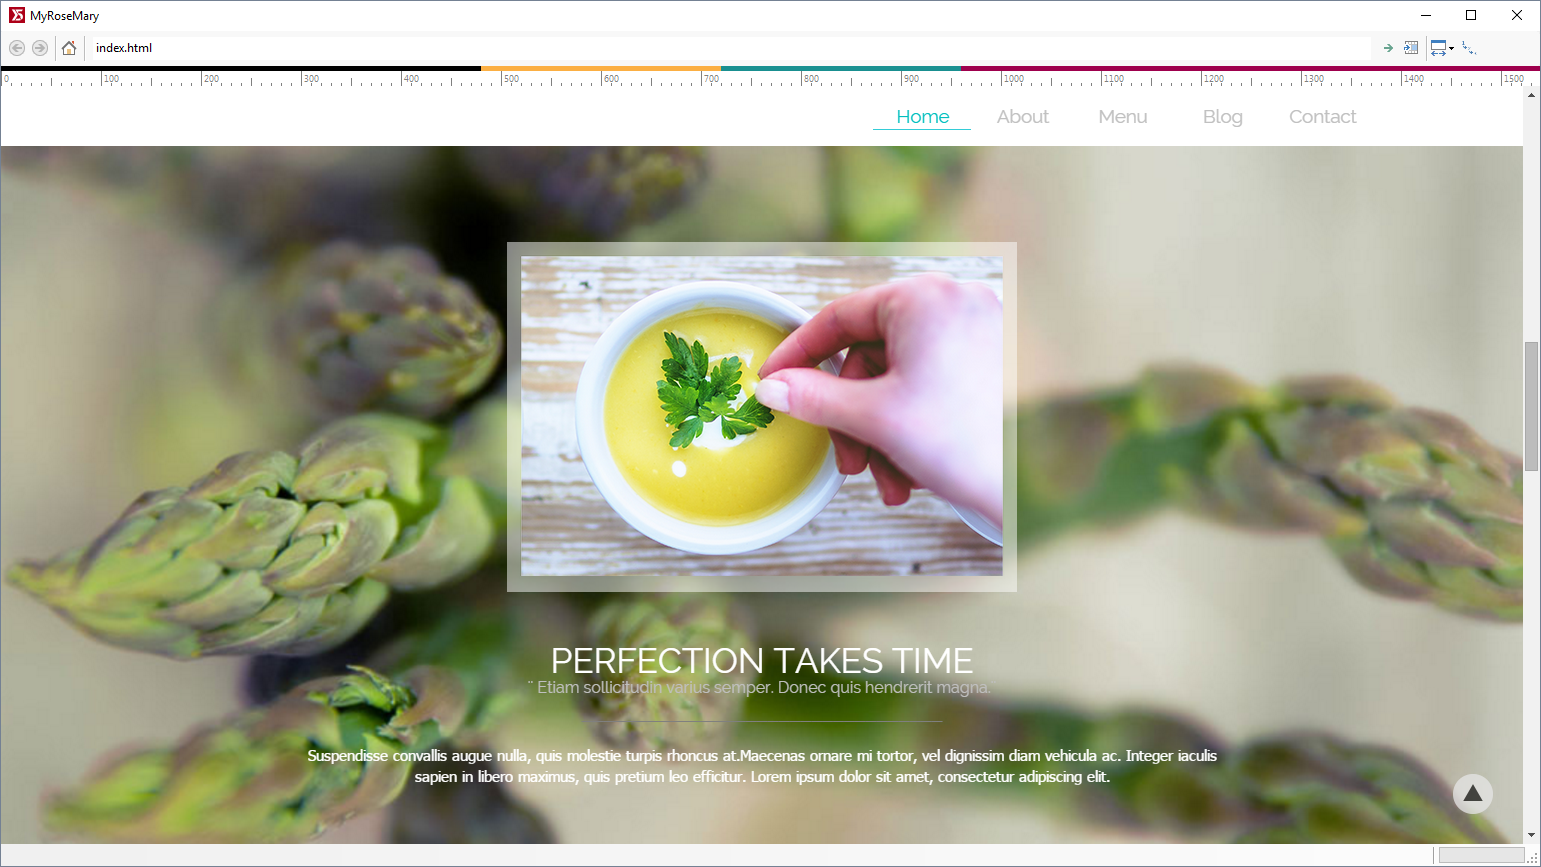
Looking at MyRoseMary Live Preview, you can see that Parallax has been applied in the middle band:

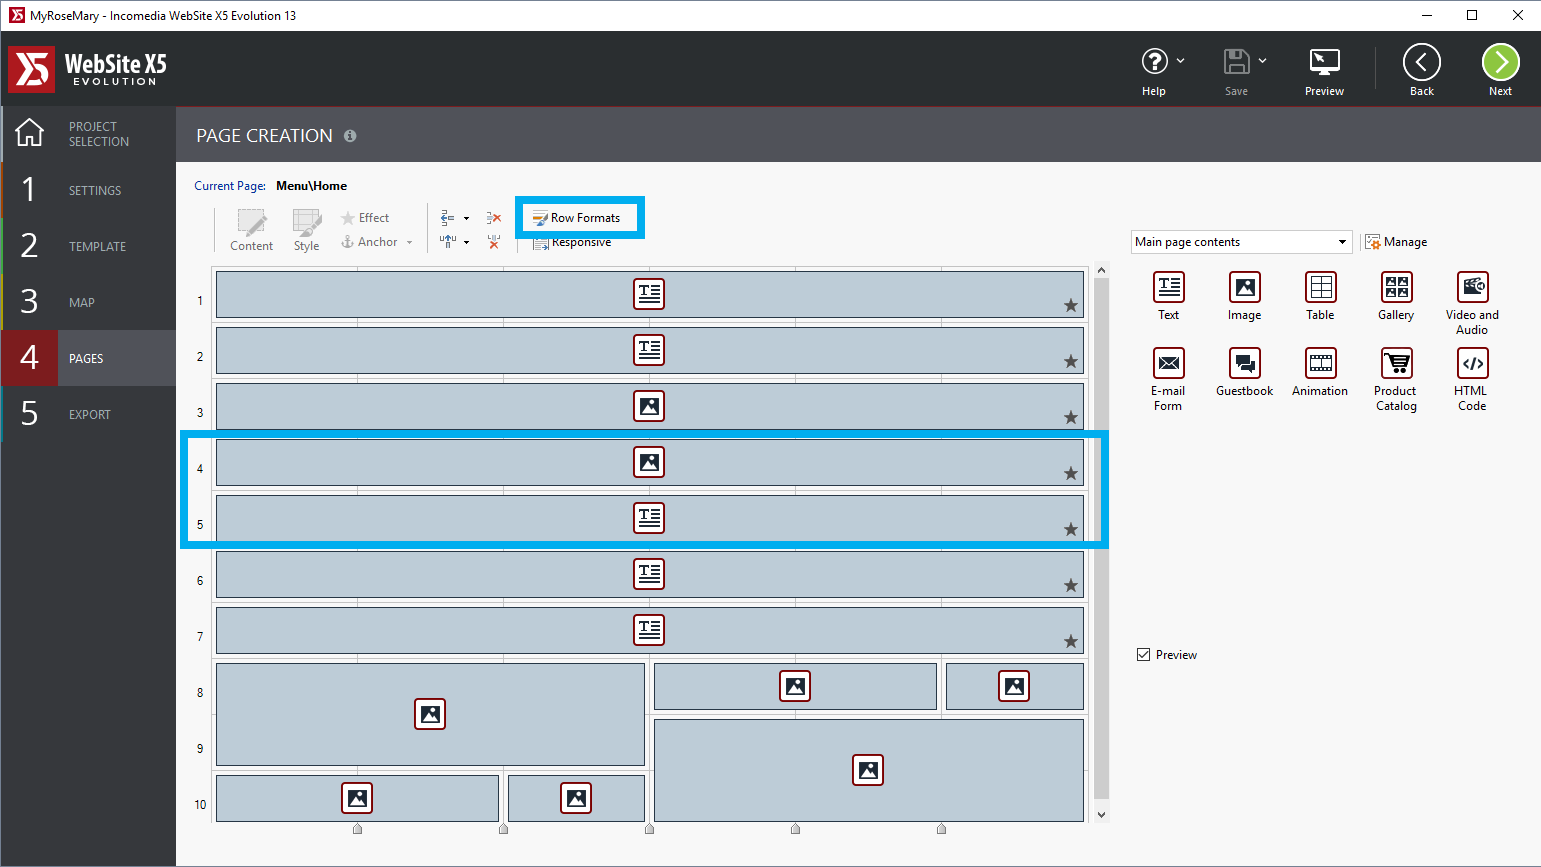
Now open MyRoseMary project, click on Step 3 and look into the Home page to discover how it has been built. See that Row 4 and 5 match with the middle strip showed above and are made up of an Image Object and a Text Object.

![]() To apply the Row Format feature, you need to add at least one Object to the Row considered.
To apply the Row Format feature, you need to add at least one Object to the Row considered.
![]() #tip
#tip
The row height has an impact on Parallax look-&-feel. The higher the item Row is, the clearer the illusion of depth will be scrolling the page. By adding text and an image of 510x320 pixel like the one you see in MyRoseMary, you'll have enough space to make Parallax stand out on your web page.
2. Row, Objects and Background
To see how we set the background image in a specific row, there are several steps you can follow:
- select Raw 4
- click on
 button from the Toolbar and enter the Row Format window.
The path should be the following: Step 4 - Pages > Page Layout Table and Toolbar Commands > The Row Formats window
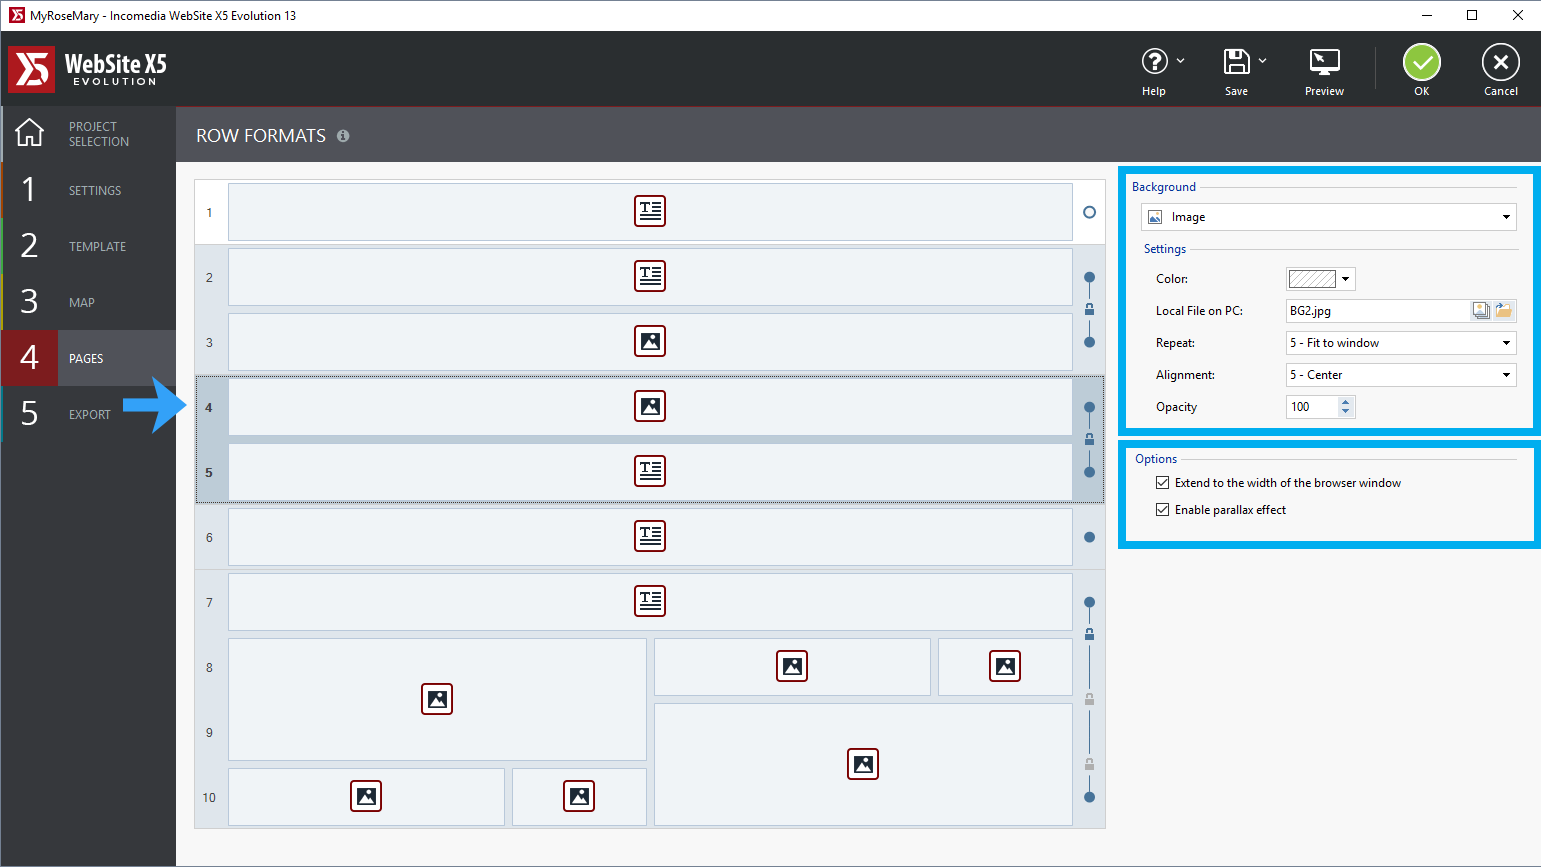
From the Row Format window you'll see:
- a Grid
- the available options
The grid shows the page's configuration.
The options include the Enable Parallax Effect and all the other settings for Row Background.
When selected, Row 4 is shown in blue and its number appears in boldface.

The background has been set on Image and active options are the following:
- Color: Transparent
- Repeat: Fit to window
- Alignment: Center
- Opacity: 100
Plus, options flagged include:
- Fit to window
- Attiva Effetto Parallasse
![]() When you're working on your projects, you should always remember to select:
When you're working on your projects, you should always remember to select:
- Fit to window: the background image will fit to the browser automatically:
- Extend to the width of the browser window and Enable Parallax: so the effect will impact on the entire width of the Row.
![]() #tip
#tip
To create a stunning Parallax, it's recommend to use a very high image background, just like in the MyRoseMary Project. Though, remember that such big size images can slow down your website. Optimized images are the best way to avoid that.
3. How to Join Rows
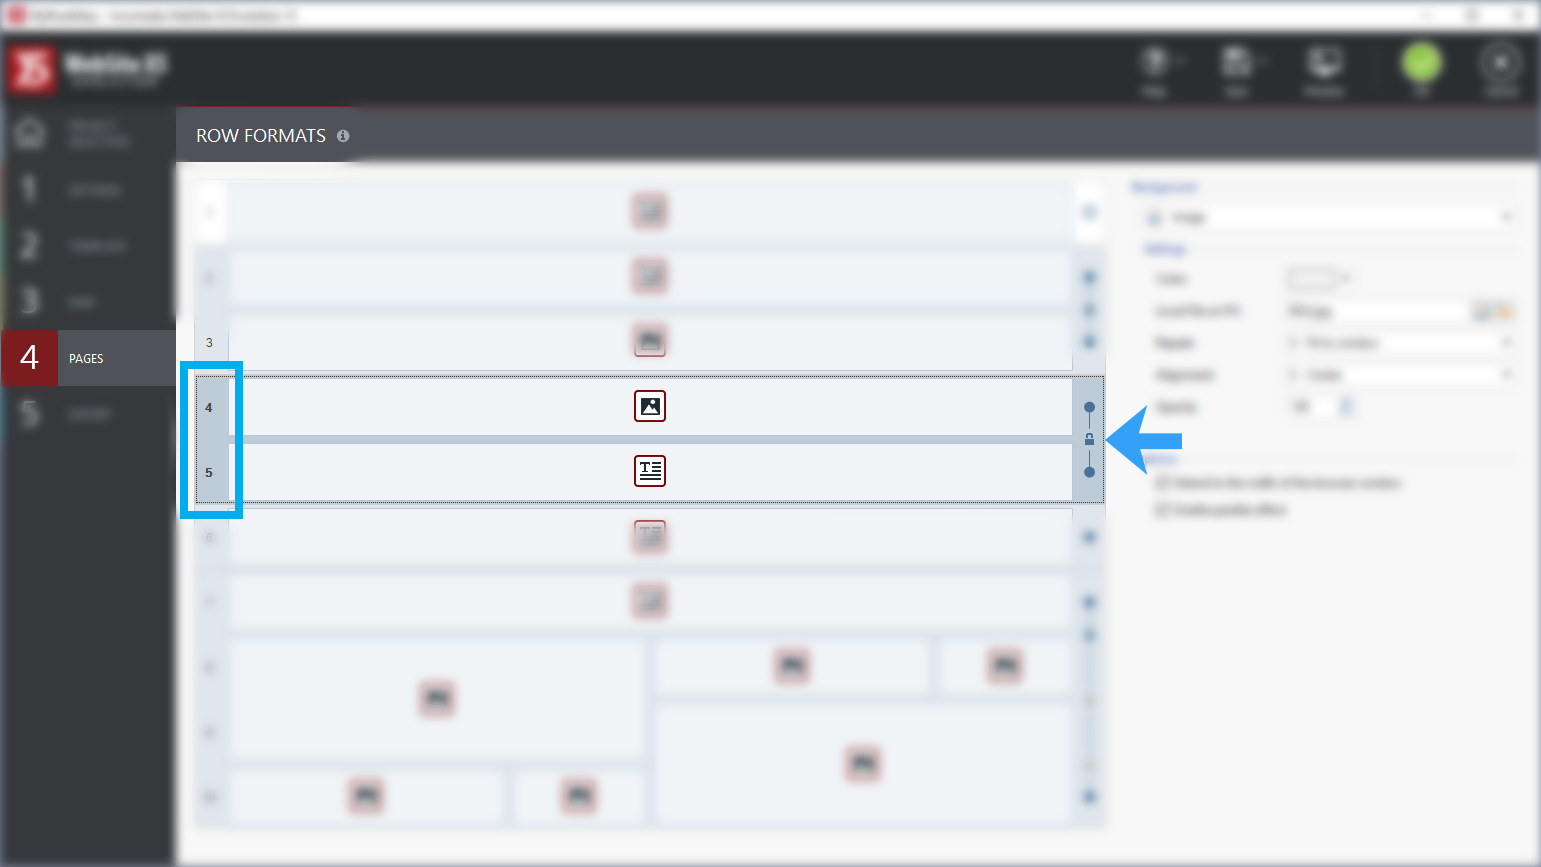
To apply Row 4 to Row 5 format, we used the Join Row function.
To join two contigue rows in your projects, you need to follow the steps below:
- open the Row Format view and place yourself on the Grid;
- move the mouse so it is halfway between the dots next to the two rows that you would like to join together;
- click on the lock icon.
When you set the lock closed, the Rows get the same format, which means Parallax too.

![]() Available options for Rows background are color, gradient, image or video. Experiment all you like, but keep in mind that Parallax effect is based on different images moving at different speed. For this reason, it's not available when color background is active.
Available options for Rows background are color, gradient, image or video. Experiment all you like, but keep in mind that Parallax effect is based on different images moving at different speed. For this reason, it's not available when color background is active.
